How to Configure Standard Pattern
In this article, you will learn how to configure Auto Turn Standard Mode.
Curve Point Selection
It is important to choose the Turn Point that best fits the operation. This selection is made in the Auto Turn settings and, by tapping button (4), the Turn Point options are toggled.
Auto Turn Options
-
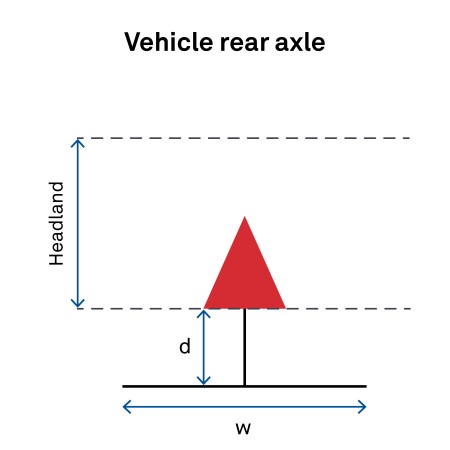
Rear axle: Use when the turn should start as soon as the vehicle’s rear axle reaches the inner headland boundary.
-
Implement boom: Use when the turn must start as soon as the implement boom reaches the inner headland boundary.
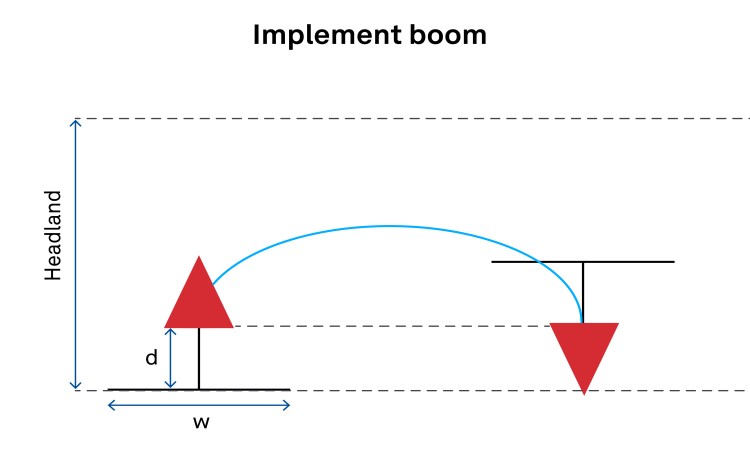 Warning: When selecting this option, towed implements may require a larger turning area. This must be considered in the headland width configured in Auto Turn Settings and Patterns.Warning (collision risk): If the implement boom is positioned in front of the vehicle, the maneuver may cause the vehicle to collide with the crop when the rows are very narrow.
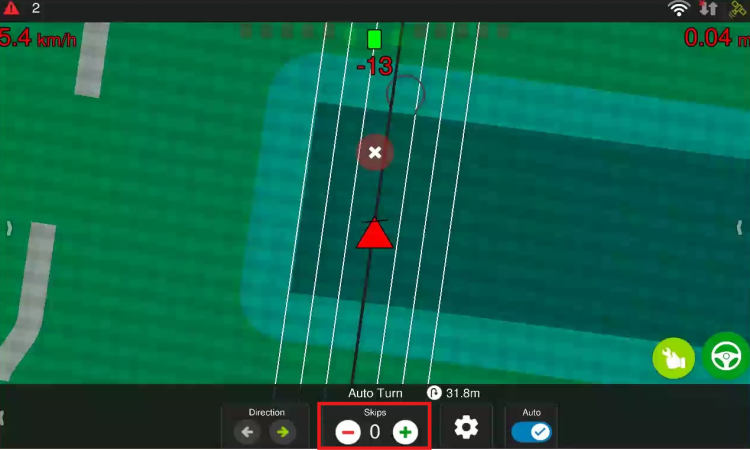
Auto Turn on the Operation Screen
Return to the operation screen; an Auto Turn dock will be available on the operation screen.
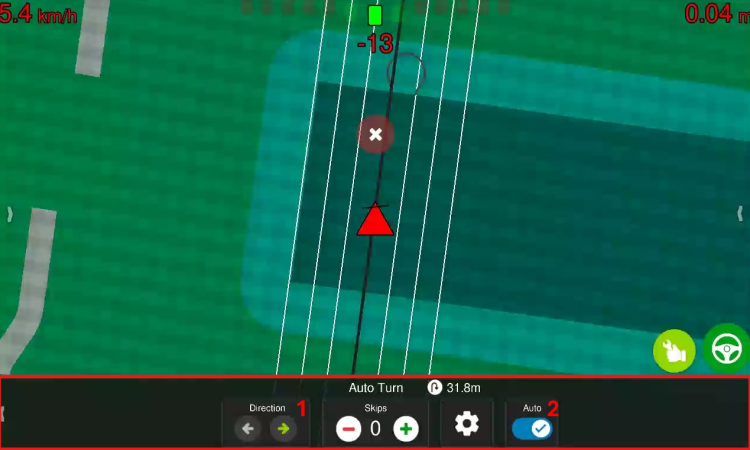
Align with the first guidance line and engage the Auto Steering system. Then set the desired direction for the first maneuver in the Direction option (1). Finally, turn on the Auto Turn system (2).
A shortcut to the Auto Headland Turn settings can be accessed via the gear icon in the operation dock.
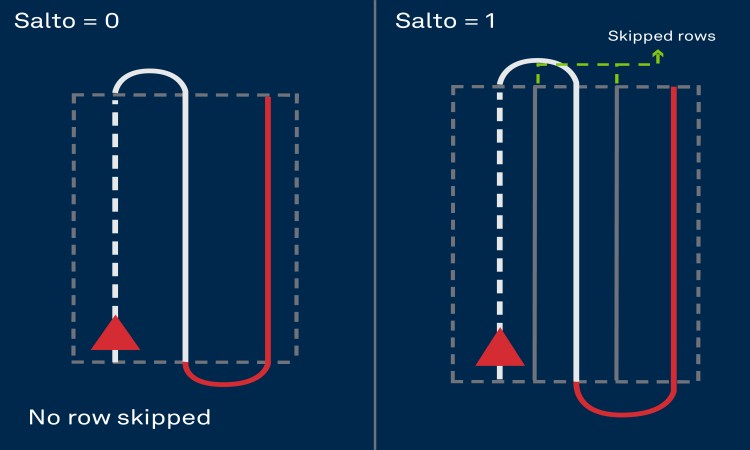
Skips Configuration
The Standard pattern allows you to customize the number of skips. This way, users can skip lines during the workflow.
This is done directly on the Auto Turn dock available on the operation screen by increasing the Skips parameter. Note that Skips = 0 means that no line is skipped.
For example, with Skips = 1, each maneuver at the end of the line will skip one line, as illustrated below.